Out of the House, Onto Its Own Supply: Powering a Garden Workspace Properly

The garden office has moved from novelty to fixture. Across the UK, thousands of back-garden rooms now host full working weeks: two monitors, a laptop dock, a printer, a desk fan in July and a 2 kW heater in February. The building is usually well specified. The electrical arrangement feeding it frequently is not. More often than either homeowners or landlords expect, the supply is a single outdoor socket, a daisy chain of extension leads, and a circuit that was originally installed for a lawnmower.
That arrangement is not merely untidy. It is a load problem, a cable protection problem and, where the workspace is let with the property, a compliance problem waiting to be documented.
The extension lead is the tell
A trailing lead through a doorway or across a patio tells you that the demand was never designed for. It also tells you something about the protective device upstream: a lead plugged into an existing outdoor socket sits on a circuit sized for occasional garden use, and its earth fault protection may be shared with equipment elsewhere in the property. When a heater, a coffee machine and a monitor bank run simultaneously, the arithmetic is not complicated, but nobody has actually done it.
Step one: measure the demand honestly
Start with a realistic equipment list rather than the equipment in use on the day of the visit. A typical single-occupant garden office might carry a 2 kW convection heater, a monitor and dock drawing perhaps 150 W, a desk lamp, a router, a small fridge, and a kettle or coffee machine at 1.5 to 3 kW. Add a second occupant and a printer and the total climbs further. Applying sensible diversity to the heating and the hot drink appliance still leaves a design figure that a spur from a garden socket will not support.
Two further questions belong in this assessment. Will the space ever host a hot tub, a workshop tool or an electric vehicle charge point? And is there any prospect of the building being let separately, which changes the calculation again. Installing for today's load and tomorrow's ambition in one visit is considerably cheaper than installing twice.
Step two: accept that a separate supply is the answer
For anything beyond a lighting circuit and a socket for a laptop, the correct solution is a dedicated submain from the main consumer unit or a spare way, protected at origin and terminating in a small distribution board within the garden building. That board then carries the local final circuits: a socket ring or radial, lighting, and any fixed heating. This arrangement gives the workspace its own isolation, its own residual current protection, and a means of switching the building off entirely when it is unoccupied over winter.
The submain cable must be sized for the design current plus voltage drop over the total run. A garden 25 metres from the house is not the same proposition as one 8 metres away, and voltage drop is where ambitious DIY schemes most often fail. A separate supply also allows the garden board to be fitted with a Type 2 surge protective device, which is worth having where expensive computing equipment sits at the end of a long cable run on an exposed site.
Step three: protect the cable properly
Steel wire armoured cable is the default choice for buried runs because the armour provides the mechanical protection that a buried cable requires. It should be installed at a depth that reflects the ground use above it; around 600 mm is commonly specified for a domestic garden, with sand bedding, warning tape and a recorded route. Where that depth is impractical, alternative protection such as heavy-duty ducting or a concrete slab should be used, and the deviation noted. Cable should not be run through a drainage trench, alongside a water main without separation, or under a patio without a route drawing being made.
Every termination point matters as much as the cable. Glands must be correctly made off to preserve the armour's earth continuity, the enclosure must suit its location, and any point where the cable emerges should be protected against damage and water ingress. Above ground, cable should be clipped clear of doorways, trellis fixings and anything a strimmer will reach.
Step four: settle the earthing question
Exporting the main earthing terminal to an outbuilding is not automatically correct, and it is not automatically wrong. The decision turns on the earthing system in use, the presence of metallic services entering the garden building, and the risk of a potential difference arising between the two locations. In many garden installations there are no incoming metallic services at all, which simplifies matters considerably. Where a water supply or a gas supply reaches the outbuilding, the position changes and the earthing arrangement should be designed rather than assumed. This is a judgement for a competent person on site, and it should be recorded.
Where a TT arrangement is adopted for the outbuilding, a local earth electrode and appropriate residual current protection become essential, and the electrode's resistance should be measured and recorded at commissioning.
Step five: plan the local board sensibly
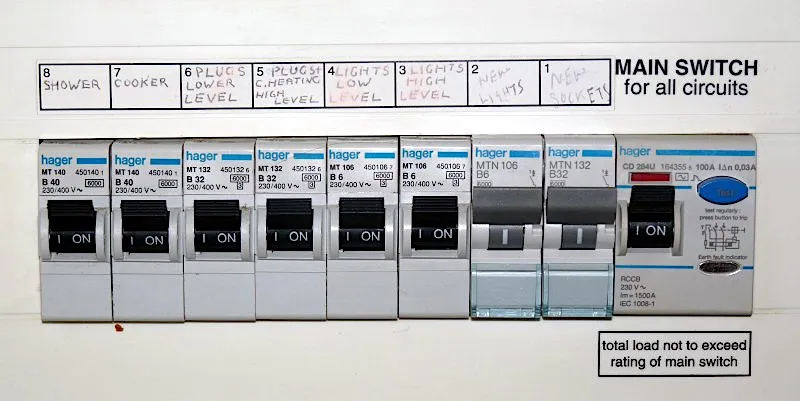
A garden workspace board should have a clear main switch, an appropriately rated residual current device or RCBOs on each outgoing way, spare capacity for at least one future circuit, and a durable circuit schedule fixed inside the lid. Local isolation for fixed heating is worth including. If the building has a small kitchenette, dedicated circuits for the kettle and any refrigeration will prevent the nuisance tripping that shared circuits produce.
The tenancy dimension
Where the garden room is let with the house, or where the property is a rental, the electrical installation in that building forms part of the fixed installation. It should appear in the electrical installation condition report for the property, be covered by certification for the work carried out, and be described in the handover information given to the tenant. A landlord who has installed a garden office without notifiable certification may find the omission surfaces at the worst possible moment, whether that is a claim, a sale, or a licensing inspection.
What a proper visit looks like
A competent electrician will establish the design load, identify the supply route, agree the cable type and depth, confirm the earthing approach, install and test the submain and local board, and issue certification covering the new circuits. The resulting document pack should include the certificate and schedule of test results, a drawing of the buried route, and a short note explaining how to isolate the building. That is a modest amount of paperwork for a workspace that is expected to carry a working week, and it is the difference between a garden office and an expensive shed with a plug in it.